Best Aniimo teams
Find a squad, check its required forms, and see how the skills work together.
Electric Premium Team
Lightning damage during the Break window.


Team notes & skill choices
How to play
- Blazen
Start with Lightning Flash, then use Electrified Impact to build Break pressure.
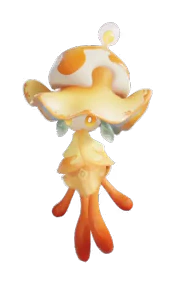
- Luminelle
Apply Lightning Surge before the damage window.
- Turbo
Use Nimbi Burst to raise team damage and Break efficiency.
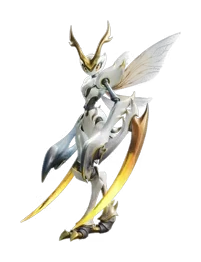
- Fulmintis
Activate Enhanced Lightning Blade, then spend EP on Lightning Blade Storm while the target is broken.
Luminelle’s beam can heal Lightning allies while she stays on field. The team has no dedicated healer; Besauce can replace Turbo when sustained EP recovery matters.
1. Blazen
Basic Form · Break · Lightning
- Electrified Impact · 20 EP
- Lightning Flash · 0 EP
2. Fulmintis
Basic Form · Damage · Lightning
- Lightning Blade Storm · 10 EP
- Enhanced Lightning Blade · 0 EP
Dark Mark & Burst Squad
Dark basic attacks backed by marking and recovery.



Team notes & skill choices
How to play
- Rookey
Open with Bouncy Sling, then continue with Guardbreak Slam.
- Fragrancier
Apply Secret Fragrance Mark and use Fragrance Bomb before switching to your attacker.
- Stellarys
Build Shooting Stars stacks, use Shadow Magic and keep attacking the marked target. Spend Comet Aureus during the opening.
- Hexxin
Use Euphoric Sonic Blast to recover EP between bursts.
Secret Fragrance boosts Dark basic attacks specifically. Keep those attacks in the sequence instead of treating the mark as a bonus to every skill.
2. Fragrancier
Basic Form · Support · Dark
- Secret Fragrance Mark · 0 EP
- Fragrance Bomb · 0 EP
3. Stellarys
Basic Form · Damage · Dark
- Shadow Magic · 20 EP
- Shooting Stars · 20 EP
- Comet Aureus · 0 EP
Dark One-Shot Squad
Dark setup for Pawney’s damage against broken targets.

Team notes & skill choices
How to play
- Dreaple
Build Drowsiness with Nimbi Attack and Hypnotic Cloud Shot; Dream Blast adds stacks and a team Dark buff.
- Fragrancier
Add Fragrance Bomb before the damage window.
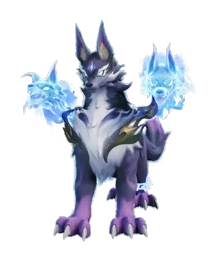
- Inferlupa
Use Hunting Pack while working down the Break bar.
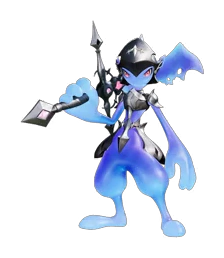
- Pawney
Activate Ironclad Armament against a broken target, then use its second press for Dragon Slayer Strike.
The burst depends on setup and a Break window. Glacy can take Inferlupa’s slot for healing, at the cost of a dedicated Break role.
1. Dreaple
Basic Form · Support · Dark
- Nimbi Attack · 20 EP
- Hypnotic Cloud Shot · 20 EP
- Dream Blast · 0 EP
Wind Swap Squad
Wind buffs and resistance reduction before Cornet takes the field.




Team notes & skill choices
How to play
- Eklue
Use Target Weakness, then hold Detect Weakness on the target.
- Tromber
Apply Zephyr’s Breath and Waltz; land Spiral Blade to lower Wind resistance.
- Tubster
Use Gale Guard, then Resting Whirlwind while the target still has a Break bar.
- Cornet
Hold Scream Splitter to enter flight, then attack with Wind Bomb Rush or Avian Harmony Ensemble.
This team has no healer. Move through setup promptly so Cornet can use the buffs before they expire.
2. Tromber
Basic Form · Support · Wind
- Spiral Blade · 20 EP
- Waltz · 0 EP
- Zephyr’s Breath · 0 EP
4. Cornet
Basic Form · Damage · Wind
- Wind Bomb Rush · 45 EP
- Scream Splitter · 10 EP
- Avian Harmony Ensemble · 0 EP
Thornblade Crit Garden
Grass critical hits with healing and EP recovery.

Team notes & skill choices
How to play
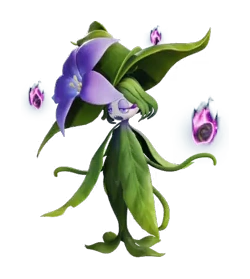
- Melloblum
Prepare Thorny Blessing and Healing Rose before Thornblade attacks.
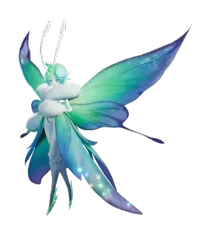
- Somniwing
Send Ethereal Light Wave through allies to improve EP recovery.
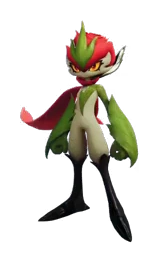
- Thornblade
Use Thorny Impact for crit rate; time Thorny Defense against an incoming hit, then attack.
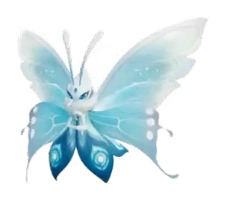
- Gracewing
Use Wind of Rejuvenation to heal the team and Purifying Dance to remove nearby allies’ debuffs.
Healing Rose blooms after critical hits. Hypnotic Spores breaks on damage and does not affect Grass targets.
4. Gracewing
Basic Form · Heal · Wind
- Purifying Dance · 20 EP
- Wind of Rejuvenation · 20 EP
Full Lightning Burst
Lightning debuffs feed Fenmane’s delayed burst.


Team notes & skill choices
How to play
- Luminelle
Prepare Lightning Surge before the attack sequence.
- Dazmand
Use Thunder Sweep for Lightning crit rate, then Electricity Shock to add Lightning Debuff.
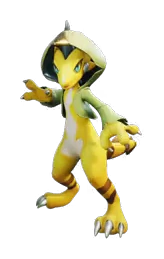
- Fenmane
Apply Thunder Field and use Thunder Imprint; build hits before the stored damage is released.
- Glacy
Use Glimmer Shot for team damage and Healing Water when HP is low.
Thunder Imprint gains its extra effect by consuming 10 Lightning Debuff stacks. Recasting it releases the stored damage early.
3. Dazmand
Basic Form · Support · Lightning
- Thunder Sweep · 30 EP
- Electricity Shock · 20 EP
Triple Fire Detonation
Fire stacks supply both energy and finishing damage.

Team notes & skill choices
How to play
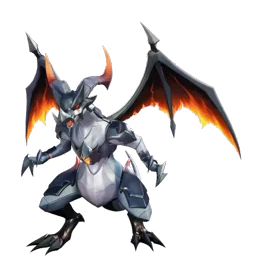
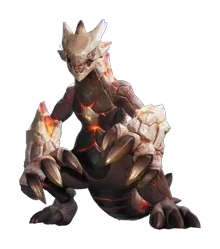
- Magmarex
Build Fire Debuff with Lava Breath; Magma Surge can stun a target with enough stacks.
- Flamerion
Use Phantom Barrage while Fire Debuff remains on the target to restore EP.
- Infergon
Use Lava Breath to rebuild stacks, then spend them with Flaming Claws.
- Glacy
Keep Healing Water available and use Glimmer Shot before the main damage window.
Flaming Claws consumes Fire Debuff. Restore EP with Phantom Barrage before spending the stacks.
Black Hole Execution
Group targets for Pawney while Rookey creates the opening.
Team notes & skill choices
How to play
- Hexxin
Place Black Hole Domain under nearby enemies.
- Rookey
Apply Bouncy Sling and follow with Guardbreak Slam.
- Pawney
Pull ordinary enemies with Elastic Sword, use Shadow Cut and save Ironclad Armament for Break.
- Gracewing
Use Wind of Rejuvenation to heal the team and Purifying Dance to remove nearby allies’ debuffs.
Elastic Sword pulls ordinary targets. Do not rely on that pull to reposition a boss.
1. Pawney
Basic Form · Damage · Dark
- Elastic Sword · 20 EP
- Shadow Cut · 20 EP
- Ironclad Armament · 0 EP
4. Gracewing
Basic Form · Heal · Wind
- Purifying Dance · 20 EP
- Wind of Rejuvenation · 20 EP
Magma Stack Engine
Keep Magmarex on field with two sources of EP support.
Team notes & skill choices
How to play
- Somniwing
Use Ethereal Light Wave before Magmarex’s sustained attacks.
- Magmarex
Build Fire Debuff with Lava Breath, then use Magma Surge.
- Flamerion
Use Phantom Barrage on the stacked target to restore EP.
- Glacy
Add Glimmer Shot and heal with Healing Water between attack windows.
Lava Punch removes Fire Debuff, while Burning Sun benefits from existing stacks. Choose when to spend the stacks.
Shield and Flame Opener
Helmut supplies Break pressure before Scorchhowl spends EP.


Team notes & skill choices
How to play
- Helmut
Use Ballistic Guard before taking hits, then chain Guardbreak Slam to build Break.
- Somniwing
Pass Ethereal Light Wave through your attacker for EP recovery.
- Scorchhowl
Time Fire Kick to dodge, then charge Burn Breaker during the opening.
- Glacy
Heal with Healing Water and use Glimmer Shot before the next burst.
A fully charged Burn Breaker spends all remaining EP. Use the recovery window before attempting another full charge.
Moonlight Starter Squad
Light damage with Rookey’s Break support.

Team notes & skill choices
How to play
- Rookey
Apply Bouncy Sling and build Break with Guardbreak Slam.
- Somniwing
Use Ethereal Light Wave to support Lunara’s EP recovery.
- Lunara
Apply Fox Mark with Lumin Bolts, then hit marked targets with Moon Impact. Use Moon-Washed to recover EP.
- Glacy
Use Glimmer Shot and keep Healing Water for damage taken during setup.
Lumin Bolts prioritizes different targets. Keep track of which enemy has Fox Mark before using Moon Impact.
1. Lunara
Basic Form · Damage · Light
- Moon Impact · 15 EP
- Moon-Washed · 0 EP
- Lumin Bolts · 20 EP
Sunlight Starter Squad
Helion’s Light attacks with a Break and recovery core.

Team notes & skill choices
How to play
- Rookey
Open with Bouncy Sling and Guardbreak Slam.
- Somniwing
Use Ethereal Light Wave before Helion takes over.
- Helion
Build Light Damage Amp with Holy Roar. Use Light Bombardment for damage and Sun-Kissed for EP.
- Glacy
Support the attack window with Glimmer Shot; heal as needed.
Helion’s skills gain additional effects while its sun buff is active. The team’s Light damage still needs a favorable matchup.
1. Helion
Basic Form · Damage · Light
- Light Bombardment · 20 EP
- Holy Roar · 10 EP
- Sun-Kissed · 0 EP
Blossom Clone Army
Irisalis attacks while the support core handles Break and recovery.
Team notes & skill choices
How to play
- Rookey
Apply Bouncy Sling and continue Break pressure with Guardbreak Slam.
- Somniwing
Improve EP recovery with Ethereal Light Wave.
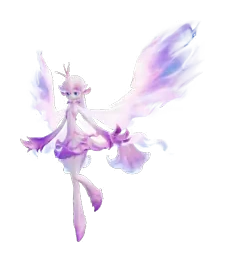
- Irisalis
Use Irisalis Shadow and Florae Descent to summon both clones, then trigger their beams with Whirling Blossom Rain.
- Glacy
Use Glimmer Shot before the attack window and Healing Water when needed.
Somniwing and Irisalis use their Prismana kits here. Hypnotic Spores cannot put Grass targets to sleep.
1. Irisalis
Prismana Form · Damage · Grass
- Whirling Blossom Rain · 20 EP
- Irisalis Shadow · 40 EP
- Florae Descent · 0 EP
Grass Crit Sanctuary
A Grass damage core with Gracewing’s healing and cleanse.

Team notes & skill choices
How to play
- Gracewing
Use Wind of Rejuvenation to heal the team and Purifying Dance to remove nearby allies’ debuffs.
- Melloblum
Apply Thorny Blessing and Healing Rose.
- Tuckin
Use Draw Nourishment to support its Hummins, then attack with Off-Key Shock Wave.
- Thornblade
Use Thorny Impact for crit rate and time Thorny Defense before committing to attacks.
Draw Nourishment’s recovery and Break bonus apply to Tuckin and its Hummins; it is not a general team heal.
1. Gracewing
Basic Form · Heal · Wind
- Purifying Dance · 20 EP
- Wind of Rejuvenation · 20 EP
Thorn Bloom Crits
Time Melloblum’s Grass buffs around Thornblade’s crit window.
Team notes & skill choices
How to play
- Melloblum
Apply Thorny Blessing and Healing Rose before switching.
- Tuckin
Use Draw Nourishment and Off-Key Shock Wave to maintain Break pressure.
- Thornblade
Raise crit rate with Thorny Impact and a well-timed Thorny Defense.
- Gracewing
Use Purifying Dance to clear team debuffs and Wind of Rejuvenation to recover HP.
Thorny Blessing triggers from Grass critical damage. Keep the damage sequence inside its duration.
4. Gracewing
Basic Form · Heal · Wind
- Purifying Dance · 20 EP
- Wind of Rejuvenation · 20 EP
Stellarys Dark Burst Squad
Prismana Turbo prepares a Dark buff for Stellarys.
Team notes & skill choices
How to play
- Turbo
Reach Shrouded in Mist, then cast Nebula Burst before switching.
- Fragrancier
Apply Secret Fragrance Mark to the target.
- Hexxin
Land Black Hole Domain when Prank is ready to apply Curse, then use Euphoric Sonic Blast for EP.
- Stellarys
Use Shooting Stars and Shadow Magic, then Comet Aureus in the buff window.
Nebula Burst needs Prismana Turbo and lasts 20 seconds. Refresh the setup between bursts; the mark specifically rewards Dark basic attacks.
1. Stellarys
Basic Form · Damage · Dark
- Shadow Magic · 20 EP
- Shooting Stars · 20 EP
- Comet Aureus · 0 EP
4. Hexxin
Basic Form · Regen · Dark / Grass
- Euphoric Sonic Blast · 0 EP
- Black Hole Domain · 20 EP
Fenmane Electric Squad
A Lightning lineup with Besauce sustaining Fenmane’s attacks.

Team notes & skill choices
How to play
- Besauce
Use Charged Geyser for EP and Electric Dance Frenzy to lower Lightning resistance.
- Luminelle
Apply Lightning Surge before switching to the Break role.
- Blazen
Use Lightning Flash and Electrified Impact to build the opening.
- Fenmane
Use Thunder Field and Thunder Imprint while the target is exposed.
This lineup uses Prismana Fenmane, Blazen and Luminelle. The Lightning engine comes from their Lightning skills; their extra elements do not change every attack.
1. Fenmane
Prismana Form · Damage · Lightning / Light
- Thunder Field · 20 EP
- Thunder Imprint · 30 EP
2. Blazen
Prismana Form · Break · Lightning / Dark
- Electrified Impact · 20 EP
- Lightning Flash · 0 EP
3. Besauce
Basic Form · Regen · Lightning
- Charged Geyser · 0 EP
- Electric Dance Frenzy · 0 EP
Stellarys Dark Squad
Dark marks, extra Flameruff spirits and Stellarys damage.
Team notes & skill choices
How to play
- Fragrancier
Apply Secret Fragrance Mark; use Withering Bloom when the team needs HP.
- Hexxin
Use Euphoric Sonic Blast for EP and Black Hole Domain for grouping.
- Inferlupa
Use Unbroken Flameruff Spirit and Hunting Pack to maintain Break pressure.
- Stellarys
Attack with Shooting Stars and Shadow Magic during the opening.
Prismana forms are specified for Stellarys, Inferlupa and Hexxin. Use those forms when following this skill selection.
1. Stellarys
Prismana Form · Damage · Dark / Ice
- Shadow Magic · 20 EP
- Shooting Stars · 20 EP
2. Inferlupa
Prismana Form · Break · Dark / Fire
- Hunting Pack · 20 EP
- Unbroken Flameruff Spirit · 20 EP
3. Hexxin
Prismana Form · Regen · Dark / Grass
- Euphoric Sonic Blast · 0 EP
- Black Hole Domain · 20 EP
4. Fragrancier
Basic Form · Support · Dark
- Withering Bloom · 20 EP
- Secret Fragrance Mark · 0 EP
Scorchhowl Fire Squad
Fire buffs and Fire Debuff stacks support Scorchhowl’s charge.

Team notes & skill choices
How to play
- Sparkelf
Use Inspiration before the Fire damage window; Treat Feed provides healing.
- Magmarex
Use Lava Breath to build Fire Debuff and create Break pressure.
- Flamerion
Restore EP with Phantom Barrage while stacks remain.
- Scorchhowl
Use Fire Kick and charge Burn Breaker during the opening.
Magmarex’s Lava Punch clears Fire Debuff. If you use it, rebuild stacks before Flamerion needs Phantom Barrage.
Sherro Water Squad
Create puddles for Water damage, healing and EP recovery.


Team notes & skill choices
How to play
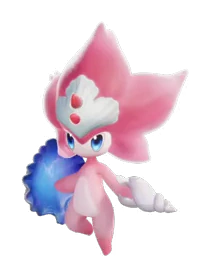
- Panpanta
Use Water Cannonade to create a puddle, then Hydro Roll near water for Break pressure.
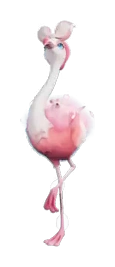
- Piopiota
Create puddles with Surf and use Surge when the team needs healing.
- Erlath
Set Bubbles where Water skills will be cast, then detonate the stored bubbles for EP.
- Sherro
Attack near water with Flowing Water Slash to empower its slashes.
Piopiota is Nighttime Form here. Its healing and Erlath’s EP recovery can absorb puddles, so replenish water before Sherro’s next attack window.
Glynsera Ice Squad
Ice Debuff setup for Glynsera with healing and EP recovery.


Team notes & skill choices
How to play
- Geoclaw
Build Ice Debuff with Icy Gravel Dance and apply Break pressure.
- Besauce
Use Charged Geyser to restore EP before the sustained attack.
- Glacy
Use Glimmer Shot for team damage and Healing Water for recovery.
- Glynsera
Build Ice Debuff with Boomerang Blade, then spend 10 stacks with Frost Tail Strike.
Prismana Glynsera also has Light attacks. Use Ice attacks for this stack-based sequence; Besauce’s Lightning resistance reduction does not boost Ice damage.
1. Glynsera
Prismana Form · Damage · Ice / Light
- Frost Tail Strike · 15 EP
- Boomerang Blade · 20 EP
Waleetle Earth Squad
Earth pressure with Waleetle spending EP on a broken target.

Team notes & skill choices
How to play
- Bouldus
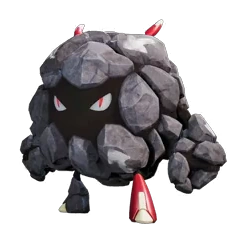
Use Rock Tackle to create Rock Piles, then control its movement with Rolling Ball.
- Minespine
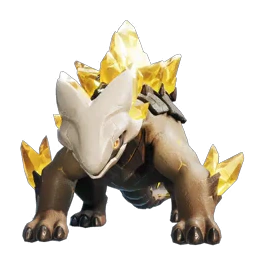
Use Seismic Wave and Stone Shell for Break pressure.
- Besauce
Restore EP with Charged Geyser before Waleetle attacks.
- Waleetle
Build Mud Ball Drift stacks, then use Sandstorm Spin during Break.
Sandstorm Spin continuously drains EP. Besauce fills the recovery role; its Lightning resistance reduction is not an Earth buff.
Cornet Wind Squad
Prismana Cornet finishes after Wind support and Break.
Team notes & skill choices
How to play
- Eklue
Use Target Weakness and Detect Weakness on the intended target.
- Tromber
Prepare Waltz and land Spiral Blade to lower Wind resistance.
- Tubster
Use Gale Guard before Resting Whirlwind.
- Cornet
Hold Scream Splitter to enter flight, then use Wind Bomb Rush.
The lineup specifies Highland Tromber and Prismana Cornet. It has no dedicated healer, and moving targets can shorten the available buff window.
1. Cornet
Prismana Form · Damage · Wind / Lightning
- Wind Bomb Rush · 45 EP
- Scream Splitter · 10 EP
Irisalis Grass Squad
Grass buffs and a recovery field support Irisalis’s attacks.


Team notes & skill choices
How to play
- Leafy
Create Turf with Cyclone of Leaves, then place Vitality Blooms for Grass allies to recover EP.
- Melloblum
Use Thorny Blessing and Rose Garden before the damage sequence.
- Pomawk
Use Rhythm Combo to build Volume and time Wild Show for Break damage.
- Irisalis
Summon clones with Irisalis Shadow and Florae Descent, then cast Whirling Blossom Rain inside Leafy’s recovery field.
This lineup uses Snowfield Pomawk and Prismana Melloblum. Stay within Leafy’s recovery field when possible.
1. Irisalis
Prismana Form · Damage · Grass
- Whirling Blossom Rain · 20 EP
- Irisalis Shadow · 40 EP
- Florae Descent · 0 EP
3. Leafy
Basic Form · Regen · Grass / Water
- Vitality Blooms · 10 EP
- Cyclone of Leaves · 10 EP
4. Melloblum
Prismana Form · Support · Grass / Light
- Thorny Blessing · 30 EP
- Rose Garden · 0 EP
No team matches. Try a companion name or another element.